My friend John commissioned this quilt - we went to church camp together when we were wee little kids. The ties were his grandfathers and he wanted two quilts made from them. I happily accepted because this quilt has been on my bucket list for a long time.
I really enjoyed making these quilts.
I did not make these the "normal" way. I wanted to keep the original width and original points of the ties. I just cut off the excess and stitched them down to a background fabric. First I arranged them all on the background, and then pinned them all down, cutting away any excess.
I do NOT recommend this method, but if for some crazy reason you try it yourself, I recommend that you use glue. On the 2nd quilt, I realized that pins shifted way too much, so I just used a little glue stick on each of the ties in between the pins, and it made it 1000x better!

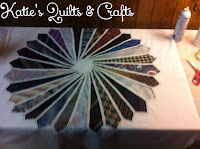
So here you can see my ties pinned to the background, and then after they were all stitched down, I cut away the excess fabric. Kinda cool looking though, right?
In the end, it all worked out beautifully though.

Below you can see the 3 stages of my corner fans. I started by sketching the fan shape onto freezer paper. I ironed the freezer paper to the quilt, and then quilted the outline. I removed the paper, and for the center lines, I just took the dull side of a butter knife and gently pressed against my ruler so that I had my quilt guidelines. I don't know how this quilt will be laundered so I didn't want to use any type of marking utensil, even chalk!
The back of the quilt is a print of blue birds. John's grandfather loved birds, and also the color blue.
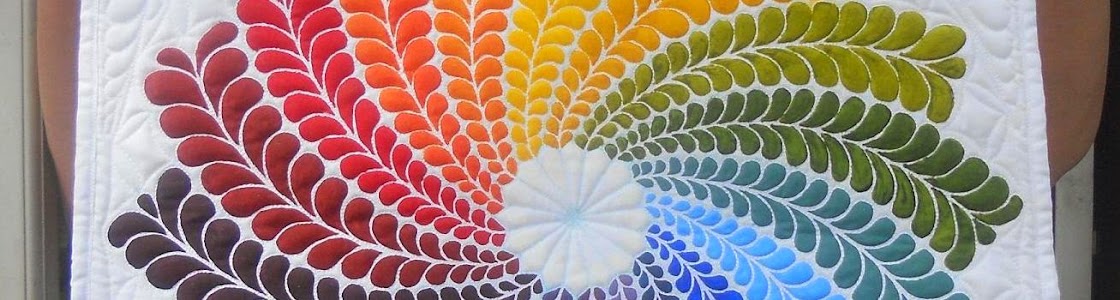
I think this is my favorite photo of the quilt - I love this closeup
A few other closeup shots.
This is the first quilt, it's a few inches smaller and the stippling in the background was much more dense.
This is the second quilt I made, it's a few inches bigger, and I had to make the circle bigger in the center to accomodate the ties. And since the whole quilt was bigger, I also made the corner fans a bit larger too. I also thought the stippling done inthe first quilt was a hair TOO dense, so I made this one a little more open - I think it more appropriately matches the quilting in the ties and the fans.
My run-down old fence - I hope I can hang many more quilts on it. ;c)